


Are you looking for easy ways to add some life to your garden? One of the most appealing yet easiest ways to revitalise your garden is to paint your garden fence. Many homeowners are often focused on landscaping designs and garden ornaments that they often overlook the wonderful impact a well maintained and beautifully painted garden fence can have.
Garden fence painting is a good way to enhance your garden but it has even more benefits than just aesthetic appeal. It is valuable for keeping your fence healthy, strong and durable for longer.
In this article we explore the some steps you might take to achieve an impressively painted fence. This step-by-step guide will equip you with the tips you need to paint your garden fence like a pro. We will cover vital fundamentals such as the benefits of garden fence painting, the necessary tools, and optimal conditions needed to get a quality outcome. Follow these guidelines and you’ll have a picture-esque garden fence in no time.
Benefits of garden fence painting
A well-painted fence can have more major benefits than meets the eye. Here are some of the benefits:
Increased durability: Fence painting enhances the longevity of your fence. This is because the paint doubles as a protective barrier for the timber against environmental threats like weather conditions and insects. It also prevents moisture and UV rays from damaging, rotting, warping and discolouring the fence.
Easy maintenance: The paint forms a smooth surface that makes it easier to remove dirt, dust and stains from painted fences than unpainted ones.
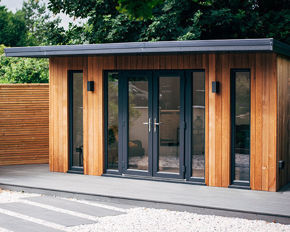
Versatile Aesthetics: a fresh coat of paint can transform the appearance of your fence and revitalise the entire outdoors. There is an unlimited range of fence paint colours so you can switch up the feel of your garden when you feel it's time for a change at an inexpensive cost.
Preparations and Considerations Prior to Fence Painting
Imagine sitting back, relaxing in your garden and appreciating your beautiful newly painted fence! We want to help you make this a reality and have the best results possible. As the well-known saying goes: ‘preparation is key’.
If you want the best results, ensure to consider these key things before jumping into the fence painting fun:
Condition of the fence
Weather conditions
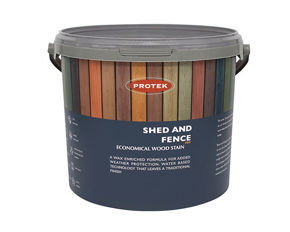
Choosing whether to use fence paint or to fence stain
Choosing the right fence paint and colour
Whether to hand paint or to use a fence painter
Equipment you will need
Let's look at these in more detail.
Examining The Condition of Your Fence
Thoroughly assess the condition of your fence timber before applying any fence paint or fence stain. This is an essential step that must not be missed to save you time, energy and money. This is because if your fence is deteriorating from fungi, rotting or moulding then painting will not resolve the underlying issues. Fences with these underlying issues wll have a stunted lifespan and will need to be replaced sooner than later.
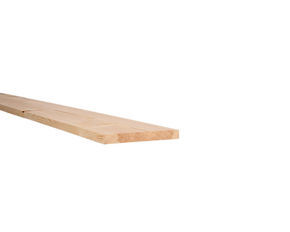
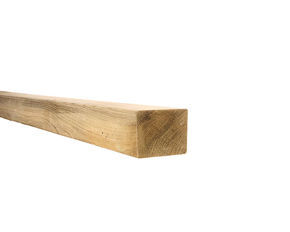
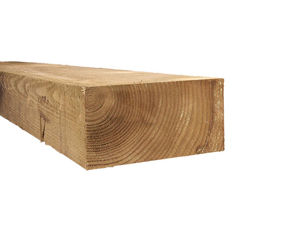
If your fence is in poor condition, replace your fence with quality softwood timber that is less susceptible to rot. We supply quality softwood timber that is perfect for fence building.
Bonus tip: Use our Barrettine universal preservative to prevent wood rotting and prolong the life of your timber
(To know how to check the condition of your fence, read step 1 of ‘how to paint a garden fence’ below)
Lists of Tools You May Need:
Protective suit or old clothing
Tarpaulin - protect surrounding areas and plants from paint
Painter's tape to mask off any areas you don't want to paint, such as gate fittings or decorative features
Sanding - Depending on the condition of your fence, you may need sandpaper to smooth out any rough spots or remove old paint or stains.
Wood stain or paint - Opt for a paint specifically formulated for fences and outdoor wood surfaces, as it will provide better durability and weather resistance
Fence paint brush / Paint sprayer
Dust mask - to prevent wood particles being inhaled while sanding
Ladder - for tall fences
Primer - to help stick the paint to the fence whilst providing a more even and long-lasting finish
Universal Preservative - protects wood from rotting
(See how these equipment is used in the ‘how to paint a garden fence’)
Weather conditions
For optimal results, it is crucial you paint in the right weather conditions. Avoid painting in direct sunlight or on rainy or windy days. If the weather is too hot the paint can become clumpy and difficult to apply. If it is too cold the paint will take too long to dry. If it has previously rained or you have washed your fence then it is important that you ensure that your fence is fully dry before painting.
How to Paint A Garden Fence in 7 Easy Steps (with no experience required)

Now let's get into these 7 quick and easy steps to achieve a well painted fence!
Step 1: Checking and prepping
As we have discussed, preparation is key for professional painting. It is important to check your fence for fungi, rot or algae before painting. When looking for rot or fungi, search for any soft yellow spots on the timber. Press a screwdriver into the fence and if it easily sinks in this may be a sign that the wood is rotting. This is best to be resolved by replacing the timber before any painting begins.
Following this, check that you have the necessary equipment (checklist located above).
Wash your fence with a damp cloth to clear it of any debris, dirt or cobweb and allow it to dry completely.
Next Check the weather conditions for the day and that the timber is dry.
Put on your Personal Protective Equipment (PPE): gloves and protective suit/old clothing.
Step 2: Prepare the area
Protect the surrounding areas of your fence such as plants, decking, aquatic environments or anything in close range by covering them with a tarpaulin or old cloth.
Step 3: Sand the fence
For best results, sand your fence down for a smooth application. Ensure you are wearing a dust mask and eye protection during this step to protect yourself from debris and any hazardous particles.
Sand the fence until the surface is smooth. Following this, use a hard bristle brush to wipe away the sanded bits.
Step 4: Prime your fence
To achieve the best results, it is good to apply a fence primer. Before applying any primer check the compatibility of your fence paint with the primer. Fence primer has a multi-purpose function.
Firstly, it can act as an adhesive for paint application thus increasing the lifespan of the paint. Secondly, it also protects the wood from UV rays and moisture from absorbing in the wood and causing mould, rot or fungi growth.
Ensure to keep on your protective gear: gloves, coverup and goggles. Apply the primer by brushing in the direction of the timber grain. Allow 6 - 12 hours for the first layer to dry before adding the next. 2 coats is the minimum required.
Tip: Our Barrettine primer can be used not just as a fence primer but also as a topcoat for the paint. (Not all fence paint requires a topcoat so check the requirements for your paint type)
Ensure that the primer lid is tightly on and store the product in a cool dry area.
Step 5: Apply the paint
Now for the best part: the fence painting!
Twelve hours or more after applying the last coat of primer, apply a thin even amount of paint starting from the top of the fence to the bottom. Paint in the direction that follows the grain of the timber. Use a smaller paint brush for corners, edges or other smaller areas. Good quality paint may only need one coat but for some you may need two or three layers of paint. Before you apply the next coat make sure to allow the paint to dry first.
Tip: before painting your fence you can test paint a small area and let it dry to see if you like the colour on your fence.
Step 6: Cleaning tools
Once finished painting, the next crucial step is to properly clean your paintbrush to ensure its longevity and future use.
Firstly, start by scraping off as much paint as possible inside of your paint tin. Once done, tightly close the fence paint and put it away in a dry and cool place away from direct sunlight.
If you have used a water-based paint, clean your paintbrush by swirling it in warm soapy water and leave it in the water for approximately 2 hours. Dry with a clean cloth and store in a dry place.
For an oil based paint, this is more difficult to remove. You will need to fill a container of white spirit. Be cautious when handling cleaning chemicals such as white spirit, as they can be harmful to you, your hardware and the environment.
Therefore ensure to:
Continue to wear your PPE
Do not use these substances inside your home in your domestic sinks or bathtub but rather outside
Properly dispose of the solvent to protect yourself, others and the environment. We recommend that you read the advice on the packaging thoroughly before handling, using and disposing of white spirit.
Step 7: Garden Fence Maintenance
We expect that a well maintained and painted fence can last for many years before a repaint is needed. It is essential to regularly inspect the fence for signs of wear, damage or rot etc.
Avoid placing heavy objects or leaning anything against the fence as this can lead to chipping or peeling of the paint you worked hard to apply.
For further fence maintenance, ensure that there are no plants or vines growing too close to the fence as they can trap moisture in the fence and cause rot over time. Therefore regularly trim and clear vegetation around the fence to allow airflow and prevent moisture build up.
By following these precautions, regularly inspecting and caring for your fence, you can enjoy a beautifully painted and well-maintained garden fence for years to come1
Summary
Fence painting is a rewarding and cost-effective way to enhance the beauty of your outdoor space. By choosing the right materials, properly preparing the surface, and following the right techniques, you can transform a tired-looking fence into a standout feature. Whether you prefer a classic neutral fence colour or a bold statement fence colour, a fresh coat of paint can make all the difference in revamping your home's exterior and creating an inviting atmosphere that you can enjoy for years to come.

